Published On Feb 10, 2023
Discussing the process of building the heels and shaping the soles to give bespoke shoes their final form: https://gentl.mn/building-heels-bespo...
#bespoke #shoes #notsponsored
SHOP THE VIDEO:
→ Shadow Stripe Socks Dark Brown & Beige: https://gentl.mn/brown-and-beige-stri...
→ Shadow Stripe Socks Bright Blue & Yellow: https://gentl.mn/blue-yellow-stripe-s...
GUIDES YOU DO NOT WANT TO MISS:
→ Advanced Men's Shoe Collection: https://gentl.mn/advanced-shoe-collec...
SEE THE FULL BESPOKE SHOE SERIES PLAYLIST HERE:
→ • Bespoke Shoes, Start to Finish | Gent...
VIDEO CREDITS:
→ Scriptwriter: E.J. Daniels & Sven Raphael Schnieder
→ Camera & Editing: Chris Dummer
→ Visual Supervision: Preston Schlueter
→ Kazuma Nishimura
Bespoke Shoes Created by Amara Hark Weber
Visit Amara at https://harkweberstudio.com
Want to see more videos? Subscribe to our channel!
→ https://gentl.mn/youtube
Become a part of the Gentleman's Gazette community - support us on Patreon!
https://gentl.mn/patron
Want to join our team? Take a look at our open positions!
https://gentl.mn/work-with-us
________________________________________________________________________
Gentleman's Gazette
https://gentl.mn/websitehomepage-gg-01
https://gentl.mn/fbshop-accessories02
Facebook: / gentlemansgazette
Gentleman Quiz: https://gentl.mn/what-gentleman-are-y...
00:00 Building Heels & Shaping Soles Introduction
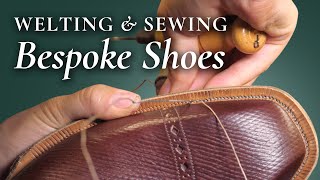
We talk all about building heels and shaping the soles, which doesn’t sound sexy at all; but actually, heel building is one of the most fascinating parts of bespoke shoemaking, as we don’t just use a heel block, but it’s actually built layer-by-layer!
00:42 How To Build-up Heels
In the last installment, you could see how the outsole was added, cut to shape, and wooden packs were added in a heel area. When you go to your cobbler or even at shoe factories, typically, the heel comes pre-made as a block. Sometimes it’s made of all leather, leather fiber, or some kind of leather product.
In bespoke shoes, the heel is typically not just stacked layer-by-layer out of high-quality leather, but it’s also shaped in a much more elegant way.
05:07 Positioning the Heel and Attaching the Heel
Before building the heel, it has to be positioned in the right way. Some makers position to heal outwardly and then shave it down. Amara prefers to do it in a different way.
She uses a pencil to mark the start and the end of the heel breast. Then, she plays the first layer of heel leather called “rand” and traces its outline. She breaks the surface with sandpaper. Once the rand is glued on, Amara presses it firmly into place, assuring that it’s exactly where she wants it to be.
06:06 Layering Heels
Amara uses wooden pegs instead of nails because the advantage of pegs is that you can even hammer them in on top of each other without creating any issues.
Amara then puts the shoes under a press, which she likes to call the “smoosher.” the shoes are pressed down in the vamp area to keep the shoe in place, then also pressed down into the heel area to really compact that heel. The shoes are left to dry in the press for about 15 minutes.
11:23 Shaping the Heel, Waist, and Fore
First, the inner part of the heel is shaped and evened out to create a smooth surface that looks the part. Also, any excess leather on the outside is now being cut away. Amara then shapes the waist and the fore – in other words, the front of the shoe.
13:05 Adjusting the Heel Height
At this stage, the lines roll straight, and Amara was ready to cut everything at an angle. After she got the angle exactly right, it was time to finish up the area again. Next, she used an edge trimmer to slightly bevel the bottom layer, so there are no harsh corners.
During the entire process of shaping the heel, Amara repeatedly puts the shoe back on a flat stone to ensure she gets the balance and the height and everything just right. She checks the shoe individually, but also the two shoes in relation to each other.
14:43 Making Further Adjustments to Heel Height
We went back and forth and discussed it. She told me what was possible and what wasn’t. As a skilled shoemaker, she really helps me to find the aesthetics I want without sacrificing comfort.
15:20 Adding a New Rand
In order to get those additional three millimeters, we needed to add a rand. So, in order to get there, the final layer has to be taken off. Again, the surface of the last rand is roughened up and blow-dried to help with the glue and allow for the braking or the sanding.
15:58 Final Shaping
It’s time to add the last extra layer of the heel, the area is blow-dried, roughened, attached with glue, hammer to attach to the formed heel, and sanded to shape.
Once it seems like everything is in its desired shape, Amara lets the shoe sit for 24 hours. To compare the finishes, Amara glassed one side and sanded the other to see the difference.